Showing posts with label Third Grade. Show all posts

Wednesday, February 15, 2012

Pop Art Prints


I had all of the third grade students print their design in which ever color they wanted on this huge sheet of paper to replicate Andy Warhol's "100 Soup Cans."

Finally busted out the foam printing plates that I've had pulled out for a month or two.  The third graders studied some printing techniques such as woodcut and linoleum printing.  We even got a little art history as we looked at some prints from the master, Mr. Albrect Durer.  The students could not believe that his prints were cut from wood!! Then we shifted to some contemporary artists and ended up looking at Andy Warhol's oh so "POP"ular POP art.  The students loved the soup cans and as we talked about them, I explained that we too would be making POP art from some everyday items, but since we are in art class, we will be choosing something in the art room to draw a still life of. 


Students started by making some sketches and still life drawings of whichever object they chose.  After they felt comfortable, I had them put their "perfected" drawing on a 4"x6" paper which is the same size as our printing plate.  I really wanted to stress the printing aspect of this project and how the image becomes an inverse when printed, so I had students involve at least one word in their print.  It could either be a word that was already on the object they drew or if their object did not have any words they could choose a related word and use it in the background.  I gave a demonstration of how the inverse works so students had a better understanding of the "reflection" principal.  I then had all the students take their smaller drawings and put it against one of our many classroom windows and use it as a tracing table.  Students flipped their papers to the backside and traced all the pencil lines onto the backside so it was a perfect inverse. 


After finishing the inverse drawing, students taped them to their foam printing plate and began tracing all their lines with a wooden scratch stick.


In the following class, we began printing.  I had all students come back and watch me make a couple of prints.  We used a breyer and printing ink for this and it worked great.  I stressed making sure that we got a nice even layer of ink on our printing plate and making sure that the plate didn't move or wiggle once we set it down.  Students were making four different colored prints on the same paper and I set out five different colors so students could choose.


Tuesday, January 17, 2012

Splatter Paint Weavings

I saw this AMAZINGLY cool idea on another blog @ http://dalimoustache.blogspot.com/search/label/3rd%20grade.  She always has some great ideas and inspiration on her blog so a big thank you to Mrs. Pfeiffenberger.  Immediately upon seeing this project I knew that I had to try it.

The first class I introduced Jackson Pollock and some of his earlier paintings (no splatter painting yet).  We had a great discussion about how his style and description of objects changed throughout his career and eventually evolved into a rapid and loose style, whereas the artists no longer tries to manipulate his or her media, but instead frees it and allows it to take control.  I showed the same video that was recommended on the Dali Moustache Blog along with a short clip from biographical movie about Pollock's life starring Ed Harris.  I then showed students a slide show of Pollock's top 20 most famous paintings and we discussed what we liked and didn't like about each of them. 

In the second class, we started to SPLATTER PAINT!!! This was a daunting task, and I must admit I was very nervous during the first class when we did this.  I had placed a large garbage bag on the floor next to each table.  I had collected some cardboard boxes that were big enough to place a 12"x18" sheet of paper inside and at least 12" deep in which we were to splatter paint.  I had given each table 5 bright colors of watered down acrylic paint in squirt bottles.  I gave a demonstration making sure to emphasize that every particle of paint that comes out of the bottle should end up somewhere inside the box...preferably on our papers.  I had that oldest student at each table start painting first and gave each student about 2 minutes to splatter and go crazy while each other student had a job such as clean up, paint tray holder, and box flap holder (one class of students figured out that if they helped each other hold up the open flaps of the box, there box got taller and allowed them more freedom for painting).  We did two rotations so each student got to paint twice and then we began clean up.  The boxes ended up looking SUPER cool too.


The third class was the one which students wanted to cry or beat me up.  I gave a big enthusiastic speech about how awesome their splatter paintings turned out and then I sprung it on them...now, we are going to CUT THEM UP!!! Haha I think a few of them actually wanted to hurt me.  Many said that they simply were not going to do it, but after they saw what we were turning them into they came around.  I showed students how to measure with a ruler to make long lines from on end all the way to the other on the long 18" side making sure to keep a 1" strip on an end to hold all of it together.  We measured and cut our painting into fringes so that it looked like a Hula skirt, and yes I did some Hula dancing with mine when I was done, heard a whole bunch of "Haha Mr. Malcore, you are so silly."  When they finished cutting the fringes, they chose two different colored 9"x12" sheets of construction paper and drew lines 1" apart all the way across the long 12" side. 

In the fourth class we began the weaving.  I showed students how to cut out their colored strips and weave them into their splatter painting.  Every other strip was the different color to create some variety.  We did lots and lots of "Over...Under...Over...Under."  I had students glue the ends of each strip into place so it wouldn't come loose.  Once finished weaving, we matted them and admired all of our hard work.  The kids really loved them and I think they turned out great.  I actually laminated four of mine and am currently using them as place mats on my diner table haha.


Sunday, January 8, 2012

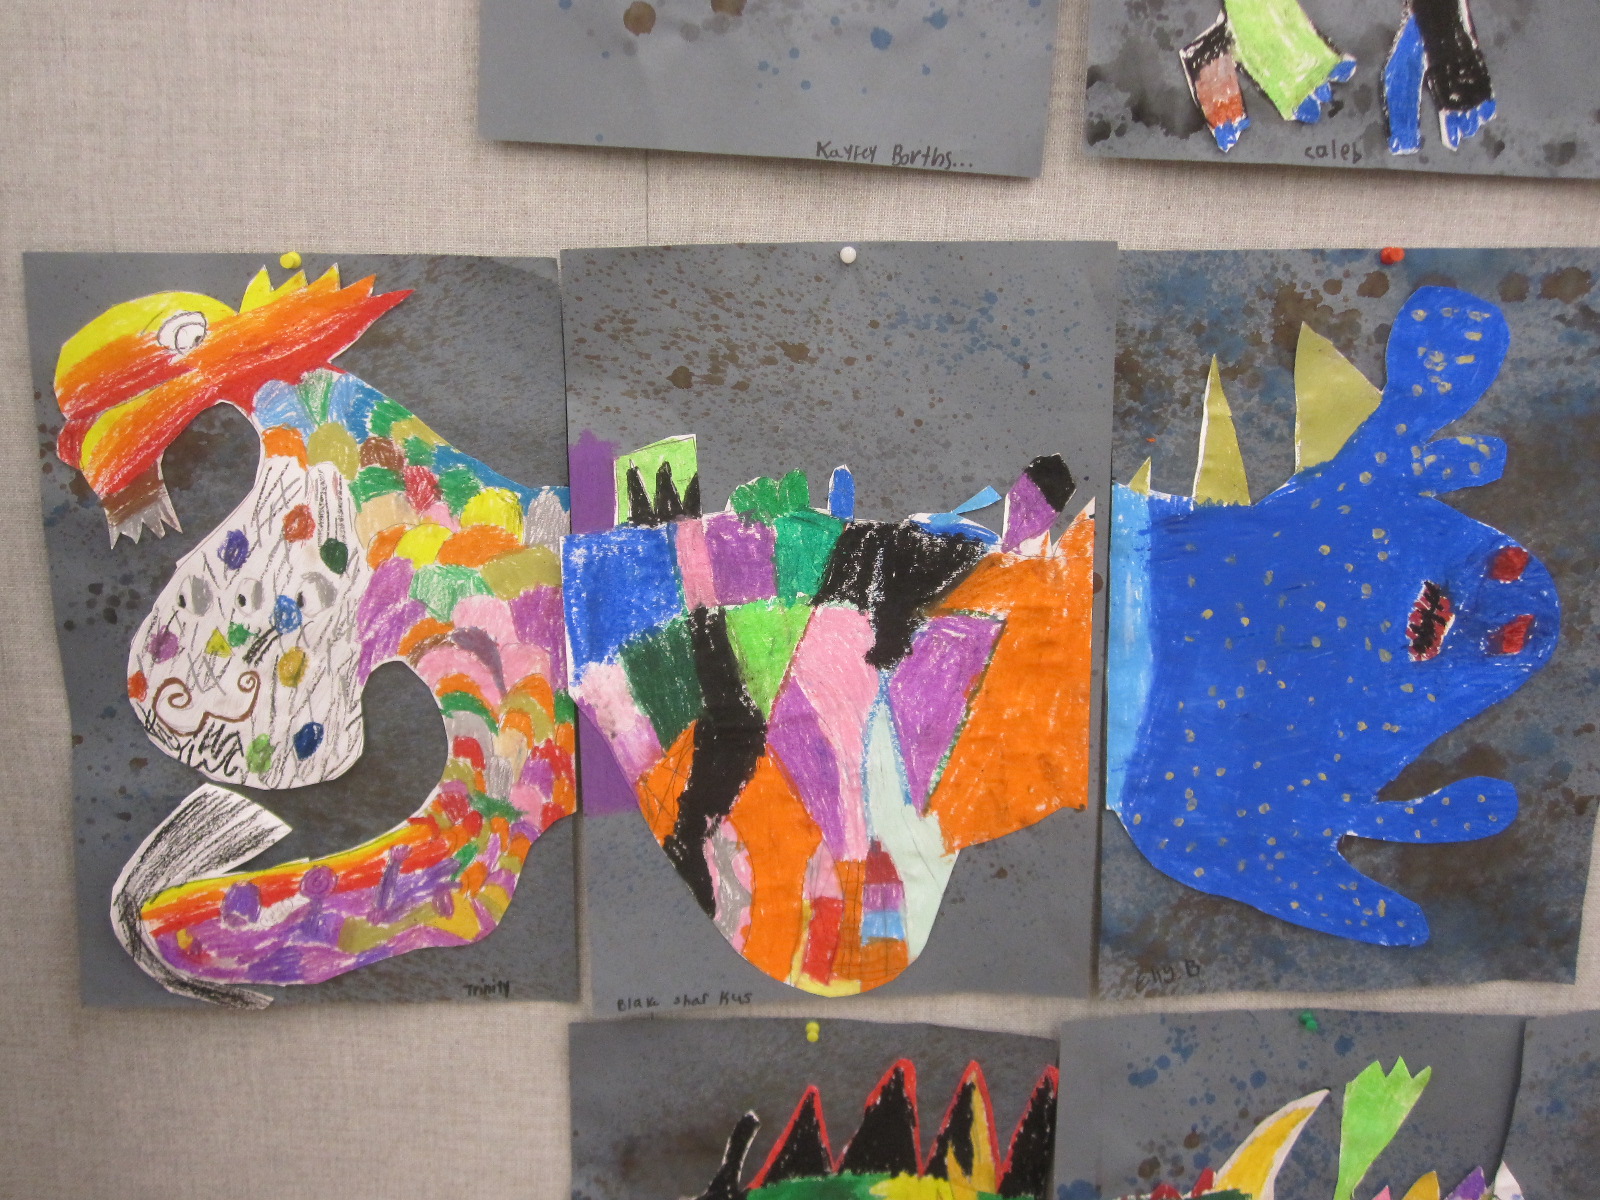
Collaborative Creatures

I've done this collaborative project for three years now and it always seems to be a really fun one.  I have a discussion with the students about collaboration and how artists use teamwork and collaboration to make interesting and amazing works of art.  I show a bunch of photos of the artwork of Brian Christopher and Jimmy apRoberts, two gentlemen whose site I stumbled on to a few years ago.  The kids love their paintings and it makes a great segue into our new project. 

I prep enough 12"x18" white papers for the whole class by marking the papers on their edges with little black marks about 3" from the top and bottom.  These marks will be used to make sure that when students begin drawing their monsters, the top of their back and the bottom of their belly will all line up with each others.  The students choose either head, body, or tail from picking a paper out of a hat.  I tell them that they have the option to work together with their table to create and color a creature that they plan and match, or they can choose to work alone so that when we finally put them together at the end of the project, it is a complete surprise as to what it looks like.  We used oil pastels to color in creatures and I let the kids spray paint a dark and gloomy background so that their brightly colored monsters would stand out.  We did this in preparation for Halloween and after all the students were done we took about 1/2 hour to mix and match them on the wall in front of the room and the kids loved showing off their strange and freaky creatures.


Saturday, January 7, 2012

Monarch Migration

Here is another great project borrowed from my wonderful art teacher friend in Appleton.  I did this project with my third grade classes and it went very well.  The kids not only learned a lot, but the final product was also quite impressive.

I started with a slide show and lots of fun facts about monarch butterflies and their amazing migration to the forests of Mexico.  Students would be making their own monarchs in this project, but not just one, we were sticking to the migration theme so each student would end up making four and had the choice to keep them all or they could pick their three favorites and discard the fourth.  We started by learning about warm and cool colors.  Students could choose whether they wanted all their butterflies to be warm colors or cool colors.  I showed them how to use pastel chalks to blend one color into another and students blended as many warm or cool colors as they wanted on four 6"x6" pieces of paper.

After blending was complete, we talked about symmetry and asymmetry.  I showed students how to fold each colored paper so that each side was symmetrical.  I had printed off a few pictures of monarch butterflies and their wings so they would have a reference to work off of.  We then took black paint and a small brush to start painting our symmetrical butterflies.  I showed students how to paint only on one side of the folded line and then fold the paper over to create a perfectly symmetrical wing.  They thought that this was very cool and loved doing it, every time they unfolded it they looked in disbelief.  After painting all four butterflies in black, I gave out white paint and we added accent marks and dots.

We made sky backgrounds with clouds and cut out our butterflies.  I showed them how you could glue down both wings to have a flat butterfly, glue down one wing to have a turning butterfly, or glue down just the body to have a butterfly in mid stroke.  These turned out beautifully and the kids were very proud of all their hard work.